Standard printer
ALIX lets you print labels on a standard printer (8.5 × 11 paper), without a dedicated label printer. The print job is sent directly to the printer, without a preview window. This page covers the prerequisites, enabling the feature, creating a Standard label template, and printing.
Prerequisites
Before you begin, make sure that:
- The printer is installed in Windows and working.
- JSPrintManager is installed on the computer (see the Install JSPrintManager section).
- You are using Google Chrome (recommended).
Install JSPrintManager
JSPrintManager is the software that lets ALIX communicate with your standard printer.
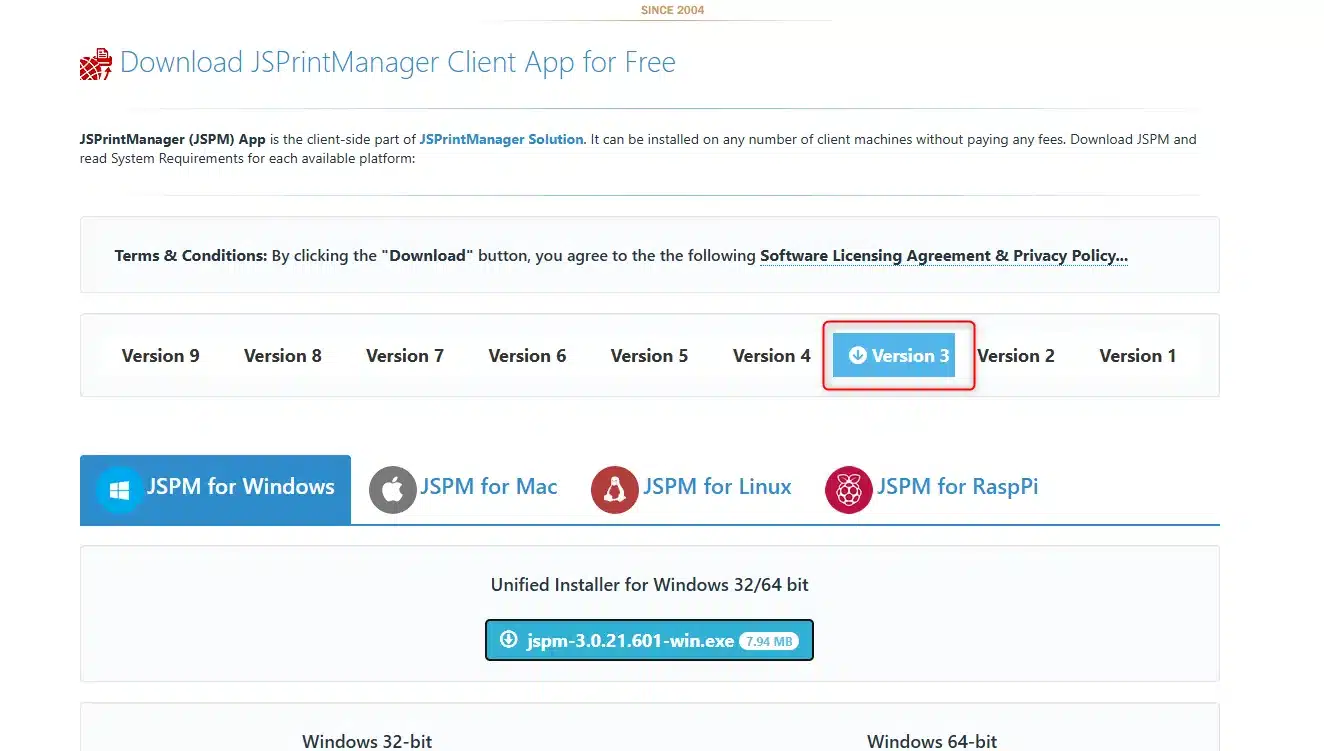
- Open the Neodynamic download page: https://www.neodynamic.com/downloads/jspm/
- Select Version 3, then the JSPM for Windows tab.
- Download the version matching the client’s computer:
- Windows 32-bit for a 32-bit system.
- Windows 64-bit for a 64-bit system.
- Unified Installer (32/64 bit) if unsure: it covers both architectures.
- Once the file is downloaded, follow the installer’s instructions.
- Then make sure JSPrintManager is running on the computer.
Google Chrome: allow local network access
If you are using Google Chrome, you must enable local network access in the browser settings for ALIX to detect your printer.
- Open Chrome’s Settings, go to Privacy and security, and then Site settings.

- Click “smart.alix.ai” in Recent Activity, or by clicking View permissions and data stored across sites.

- Find the Local network access and choose Allow.

Enable the Standard printers configuration
Note: this configuration is disabled by default. It must be enabled for standard printers to appear in ALIX.
- In Settings, go to Configurations -> General.
- Enable the Standard printers configuration.
Print on a standard printer
Note: It is not possible to select a standard printer if the chosen label has no Standard template.
- Print an inventory label in the Inventories module.
- In the print wizard, select the desired label.
- In the Standard printers section, select your printer.
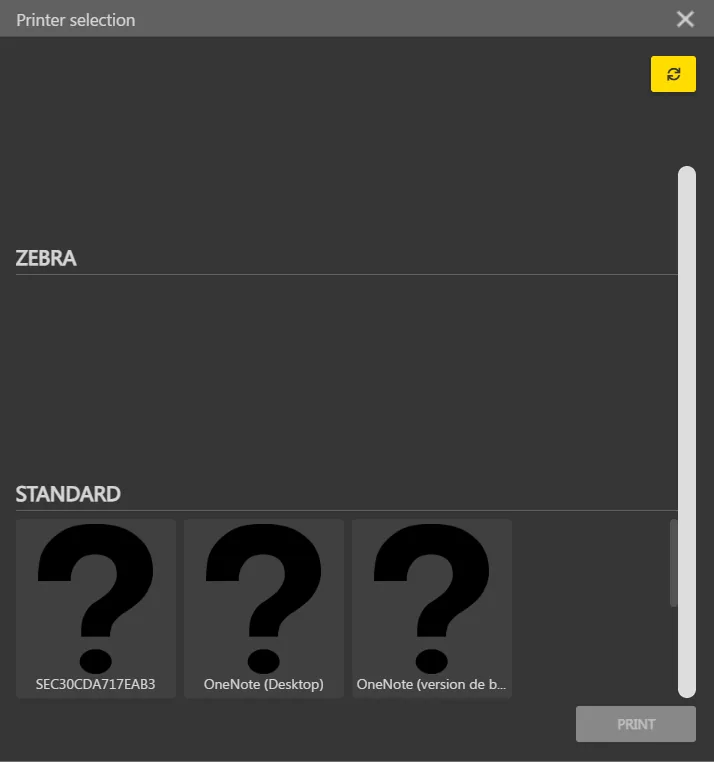
- Confirm to start printing.
Note: printers already detected as label printers (Dymo, Zebra) do not appear in the standard printers list.
Troubleshooting
| Symptom | Likely cause | Solution |
|---|---|---|
| No standard printer appears in ALIX | The Standard printers configuration is not enabled | Enable it in Settings -> Configurations -> General (see Enable the Standard printers configuration). |
| The configuration is enabled, but no standard printer appears | The browser is blocking local network access | Follow the steps in Google Chrome: allow local network access. |
| The standard printer cannot be selected (greyed out) | The chosen label has no Standard template | Add a Standard template to the label (see Create a Standard label template). |
| My printer appears as Dymo or Zebra, not as a standard printer | Printers detected as label printers are excluded from the standard list | Normal behavior: a printer is only offered once. |