To ship inventory, you must first create a shipment. Once created, you can then ship.
It is possible to create the shipment in advance and then ship later. When you’re ready, click on it in the list and ship by following the steps in the next section.
Note: you can enlarge the shipment window by by clicking on the square icon in the top right corner.

Create a shipment #
- From the menu on the left, choose Inventories -> Shipments.
- Click Create shipment in the top right.

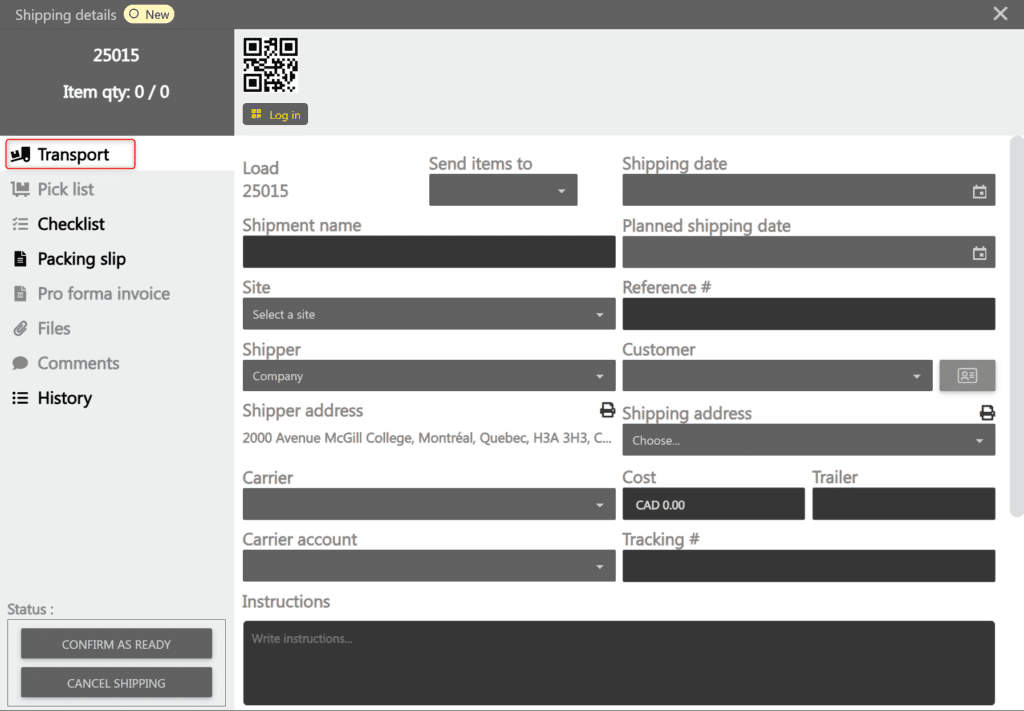
- On the Transport tab, enter the shipment information. This information is used to create the packing slip.

- In the Pick list tab, add the items that will be shipped.

- On the Checklist tab, set up a list if needed. More info on the checklists here.


Ship inventory #
- From the menu on the left, choose Inventories -> Shipments.
- Click on the desired shipment. A window opens with the shipping details.
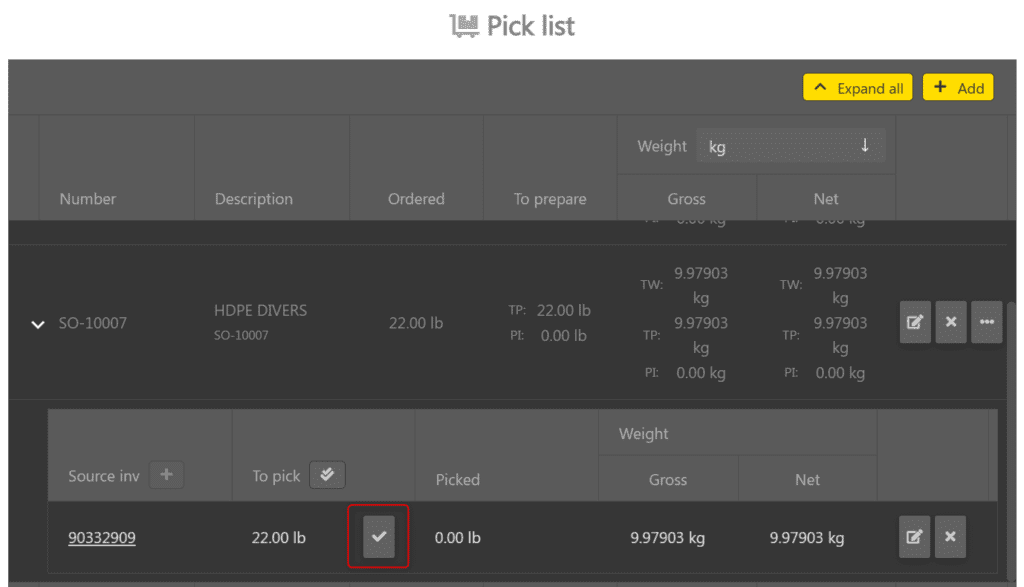
- In the Pick list tab, you will find the inventories to be shipped. Click the chevron on the left of an item line to show its inventory sources.

- If a source inventory is already present, click the checkmark to indicate that it has been picked.

- (-> Feature coming soon) To pick all eligible sources of the line at once, click Pick all in the header of the To pick column. The picked measure of each eligible source becomes the source measure.

- To reserve inventory or add a source, click the + in the header of the Source inventory column. The Reserve popup opens. See the Reserve inventory from the shipment section.

- If a source inventory is already present, click the checkmark to indicate that it has been picked.
- If a checklist is set up, complete it before you can ship. More info on the checklists here.
- When the shipment leaves the warehouse, click Ship items in the bottom left.


Reserve inventory from the shipment #
-> Feature coming soon
From the Pick list tab of a shipment, you can reserve inventory for an item line directly, without going through the sales order.
Note: it is impossible to reserve inventory if the shipment is at a locked status (for example Shipped or Canceled).
- From the menu on the left, choose Inventories -> Shipments, then click the desired shipment.
- In the Pick list tab, click the chevron on the left of an item line to show its sources.

- In the header of the Source inventory column, click the +.

- The Reserve popup opens and shows the inventories available for this item.

- Select the inventories to reserve:
- Manually: check an inventory’s box. The Measure to reserve fills automatically to the maximum possible value; adjust it as needed.
- Automatically: click Automatic selection. ALIX checks the necessary inventories, prioritizing those already Reserved, then completes with Not reserved inventories if the target measure is not reached.
- If needed, turn on the Picked toggle of a selected inventory so its source is created already picked.

- Click Add. The popup closes and the new sources appear in the line’s sub-grid.


